You can easily change the appearance of your scheduling widget in the following ways.
Note that only lowercase text should be used in your URL.
Button Colour
- Go to My Settings > Web Integration
- Go to the Scheduling Widget Colour Picker section
- Select the default colour boxes to modify the button background and label colour as desired
- Confirm button label and appearance
- Visit your scheduling widget link to see the changes
Button Text
- Go to My Settings > Web Integration
- Go to the Scheduling Widget Colour Picker section
- Edit the default label text as desired
- Confirm button label and appearance
- Visit your scheduling widget link to see the changes
Show More Days
By default, your scheduling widget will show the next 7 days of activities. To display more days, add the following text to the end of your scheduling widget link.
?days=30The result should look like this:
https://bookamat.co/embed/mystudio?days=30Sort By Pack Name
By default, your scheduling widget will sort Credit Packs by the amount. To sort by name, add the following text to the end of your scheduling widget link.
?packs-sort-by=nameThe result should look like this:
https://bookamat.co/embed/mystudio?packs-sort-by=name

To use sort by amount, add the following text to the end of your scheduling widget link.

?packs-sort-by=amount
Hide Filters
To hide the drop down filters, e.g. Services, Locations & Teachers, add the following text to the end of your scheduling widget link.
?filters=noneThe result should look like this:
https://bookamat.co/embed/mystudio?filters=noneHide Columns
To hide the ‘Teacher’, ‘Locations’, ‘Level’ or ‘Spaces’ columns, add the following text to the end of your scheduling widget link.
?columns-hidden=teacherThe result should look like this:
https://bookamat.co/embed/mystudio?columns-hidden=teacherTo hide more than one column add a comma , between names. The result should look like this:
?columns-hidden=teacher,location,level,spacesShow/Hide Tabs
To show the Classes, Packages, Private Lessons & Events tabs add:
?tabs=allTo show only the Classes tab and hide the others, add:
?tabs=scheduleTo show only the Events tab, add:
?tabs=eventsTo show only the Packages tab, add:
?tabs=packsTo show only the Private Lessons tab, add:
?tabs=privatesDirect Tab Links
To direct visitors to the Packages tab, add:
?selected-tab=packsTo direct visitors to the Private Classes tab, add:
?selected-tab=privatesTo direct visitors to the Events tab, add:
?selected-tab=eventsLocation Specific Schedules
In some instances it may be desirable to only show the activities for one location per schedule. To only show activities for one location on the Classes tab, add:
?location=location-nameLocation-name should be the name of the location as listed in your business account under My Business > Manager > Locations. It should be typed in lower case and with a hyphen (-) to replace blank spaces. For example:
?location=large-yoga-roomService Specific Schedules
To create a calendar which shows only one type of service (class type), and hides the others, add:
?services=[service-name]For example:
?services=group-yoga-classTeacher Specific Schedules
To create a calendar which shows only one instructor’s classes and hides the others, add:
?filters=none&staff=[staff-id]To obtain the staff-id go to the My Business > Staff page, select Options > View Account for the staff member. In the browser URL you will find the staff’s ID. For example: /business/client/91/outstanding where 91 is the staff ID.
?filters=none&staff=91Using Multiple Customisations
To use more than one of the above customisations in a single scheduling widget link, simply add: & instead of ? For example:
https://bookamat.co/embed/mystudio?days=30&filters=none&staff=91Events, Retreats & Workshops
The scheduling widget will also show any events, retreats and workshops you have added under an ‘Events’ tab.
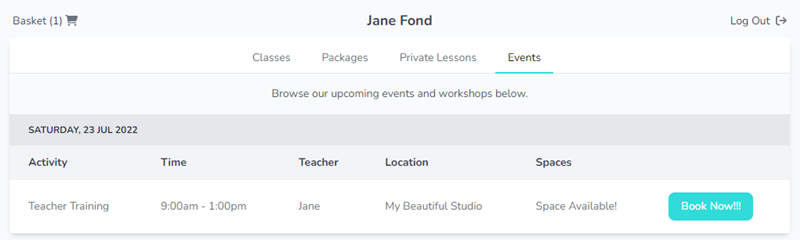
Please use the category type, ‘Events’, ‘Workshop’ or ‘Retreat’ when you create / edit your service to ensure it displays in the Events & Workshops tab on your live schedule.
Private Lessons
The scheduling widget will also show any one-on-one sessions under a ‘Private Lessons’ tab.
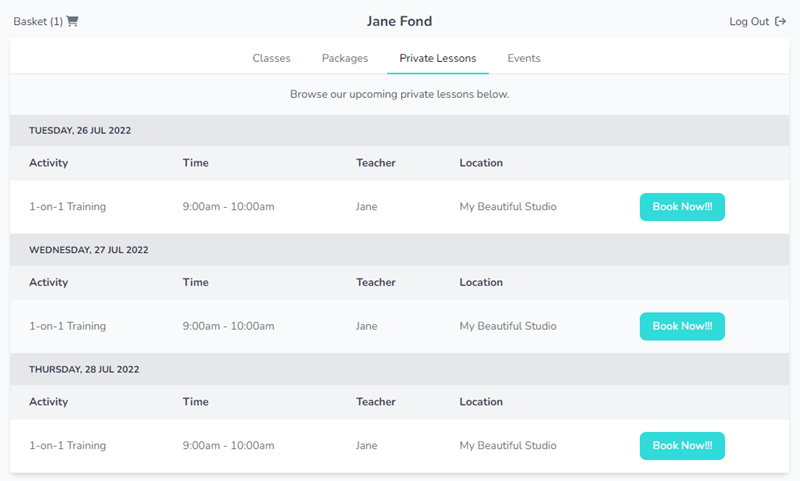
Any activity which is set to have a maximum number of participants of 1 will be displayed here.
Group Price By Category
Group pricing by category, e.g. Group Classes, Private Classes, Intro Offers etc. Grouping pricing makes it easier for clients to browse different pricing options via the app and scheduling widget.
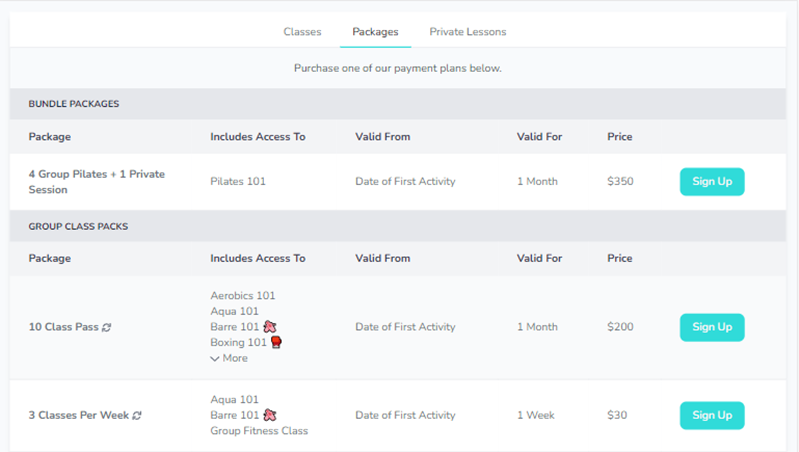
How do I group pricing by category?

1.	Go to My Business > Manager > Services or Price Editor
2.	Select Options > Edit Pricing, for the pricing you want to group
3.	Set the 'Category' as desired
4.	Select 'Update Pricing' to confirm
Teacher Biographies
The scheduling widget can also display your teacher biographies and profile picture. This feature can help new clients choose a teacher who they connect with.

How do I add a teacher biography?

1.	Go to My Business > Staff
2.	Select Options > Edit Biography, for the desired teacher
3.	Enter your text
4.	Select 'Save & Close' to confirm
How do I add a teacher profile image?

1.	Go to My Business > Staff
2.	Select Options > View Account, for the desired teacher
3.	Go to the Profile tab and select 'Choose a File'
4.	Confirm your profile image